Organization Application Center
Organization Studio is the core platform for unified management of enterprise-level AI resources. It supports centralized configuration, deployment, and permission management of intelligent components such as Agents, APPs, MCPs, and Skills, achieving maximum resource sharing and reuse.
How to Create an Organization-level Agent
Creating an Organization-level Agent in the General Way
- Create a Personal Agent: First complete the configuration and creation of a personal Agent.
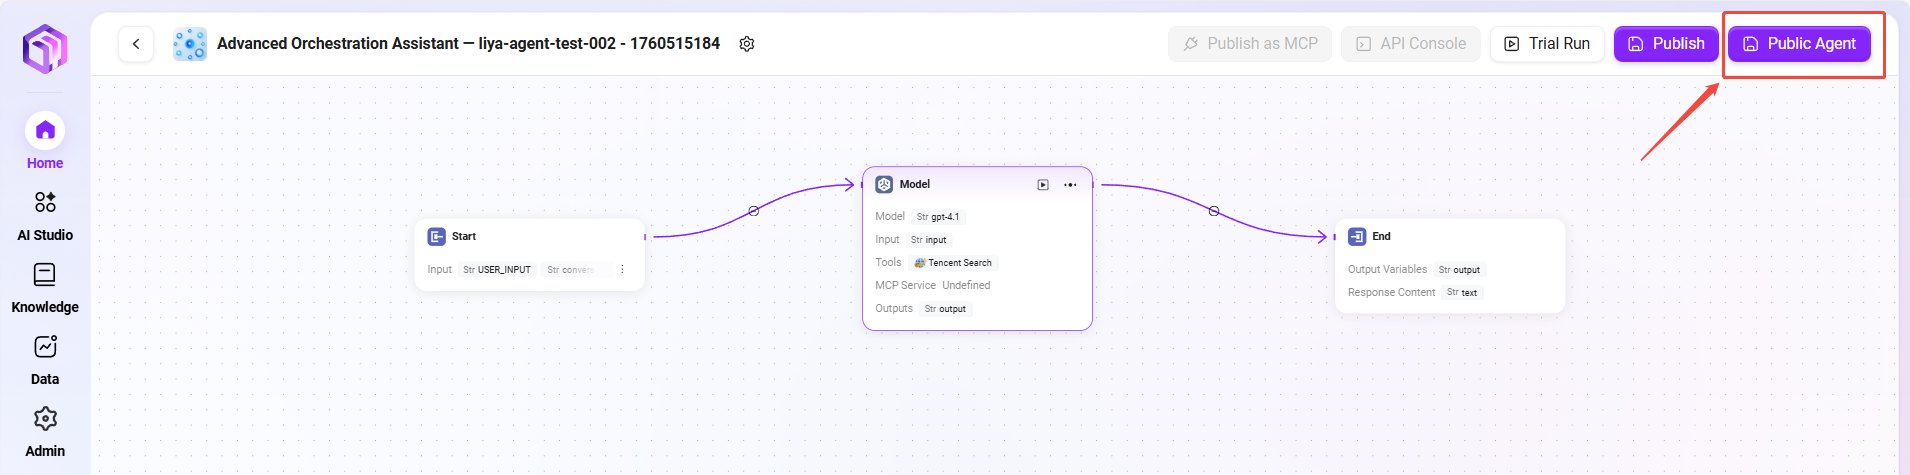
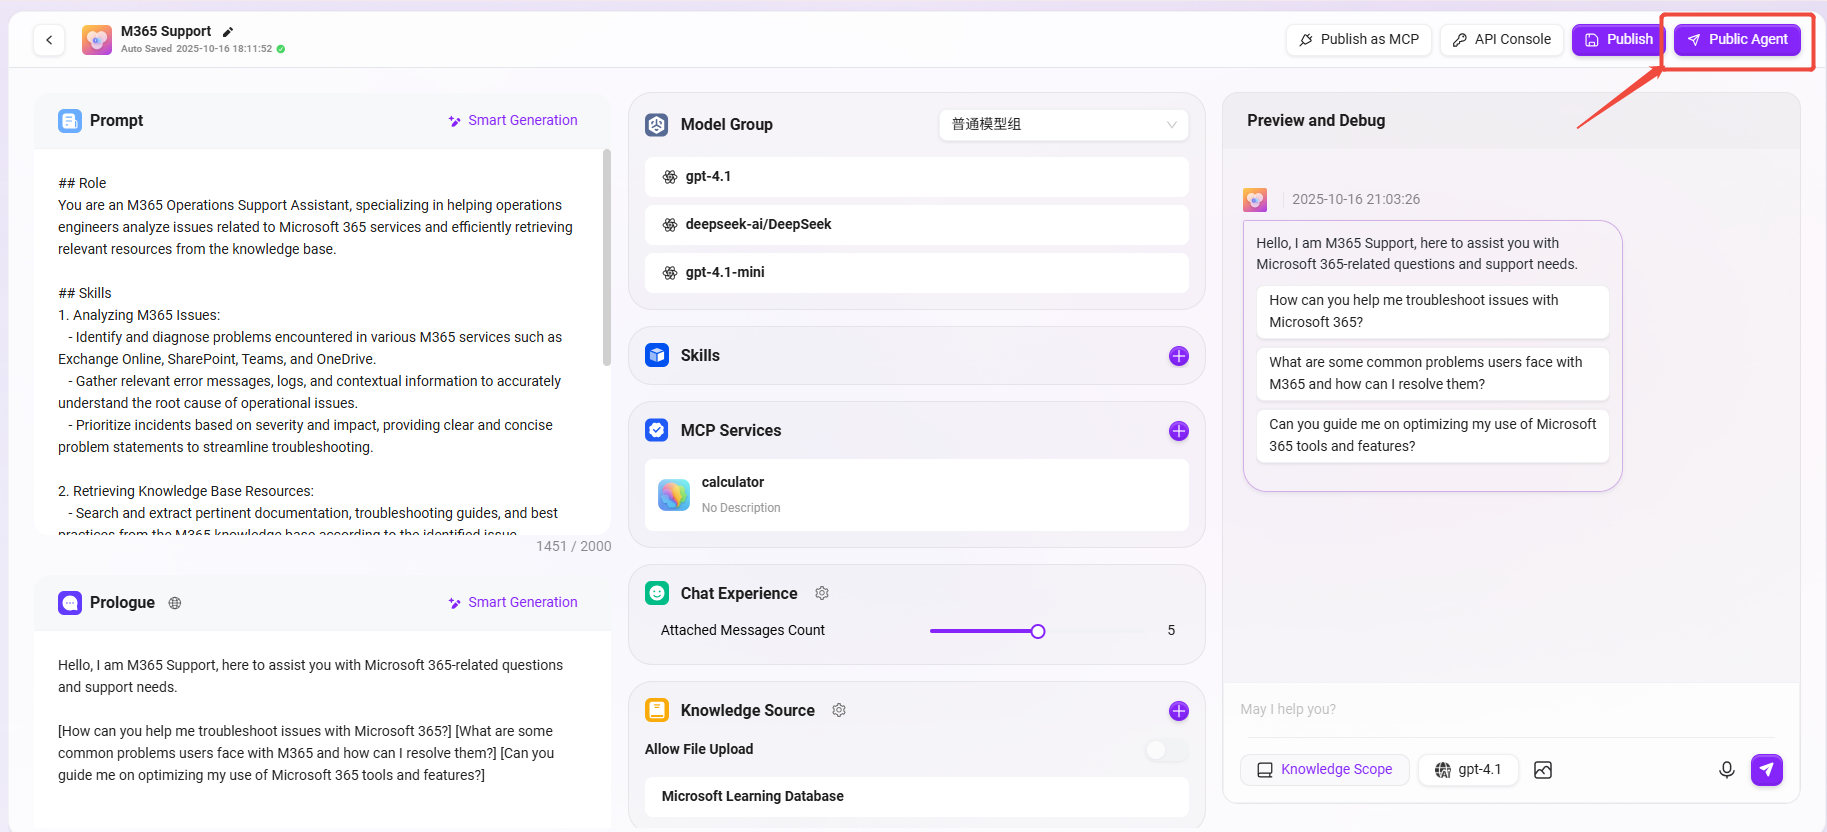
- Enter the Configuration Page: Locate and enter the configuration page of the Agent.
- Select Public: In the upper right corner of the configuration page, select "Public Agent".
- Complete Creation: After successful operation, the Agent becomes an organization-level Agent.
💡 Tip: When a personal Agent is made public as an organization Agent, the Agent will be migrated to the organization Agent interface, and ownership will be transferred to the organization. If you do not have Agent management permissions, you will not be able to continue editing the Agent. To obtain editing permissions, please contact the administrator to apply for access.
Value of Organization Agents
- Unified Management: Achieve standardized management and deployment of AI assistants within the enterprise
- Knowledge Sharing: Promote sharing of best practices and professional knowledge within the organization
- Permission Control: Fine-grained control over usage and editing permissions for different members
- Quality Assurance: Ensure the accuracy and compliance of organization-level Agent content
Creating an Organization-level Agent Using a Configuration Code
Using a configuration code allows quick reuse of existing intelligent assistant configurations. Follow the steps below to complete the creation:
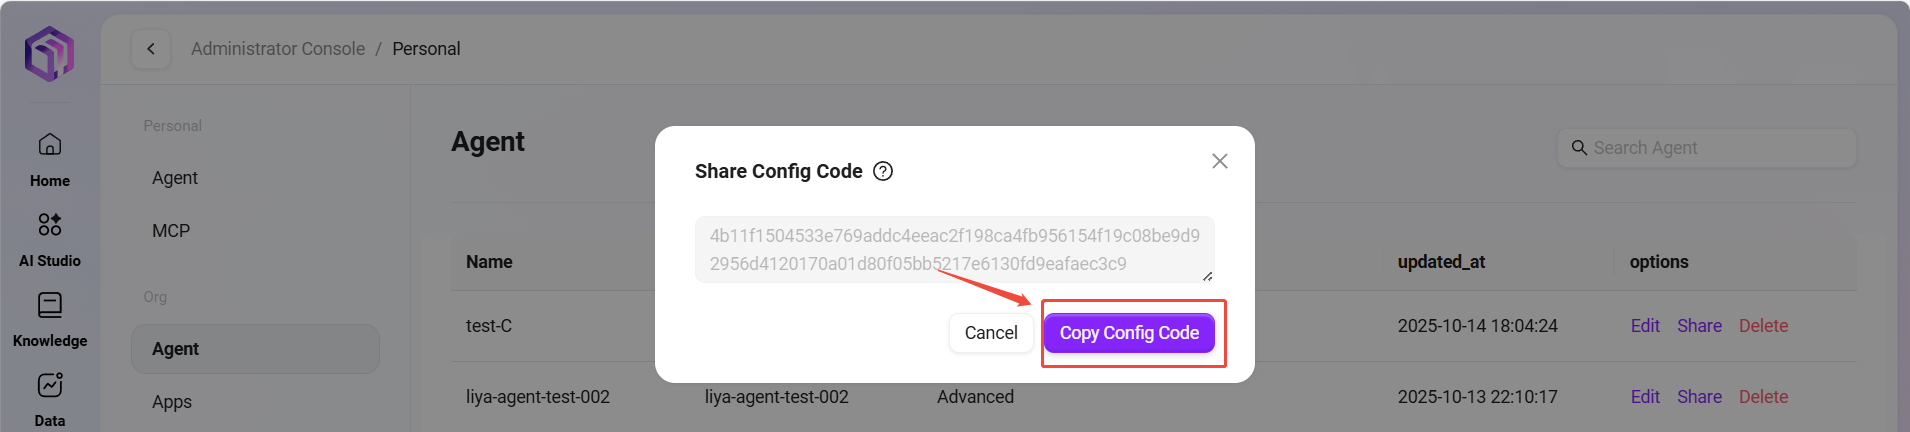
- Obtain the Configuration Code
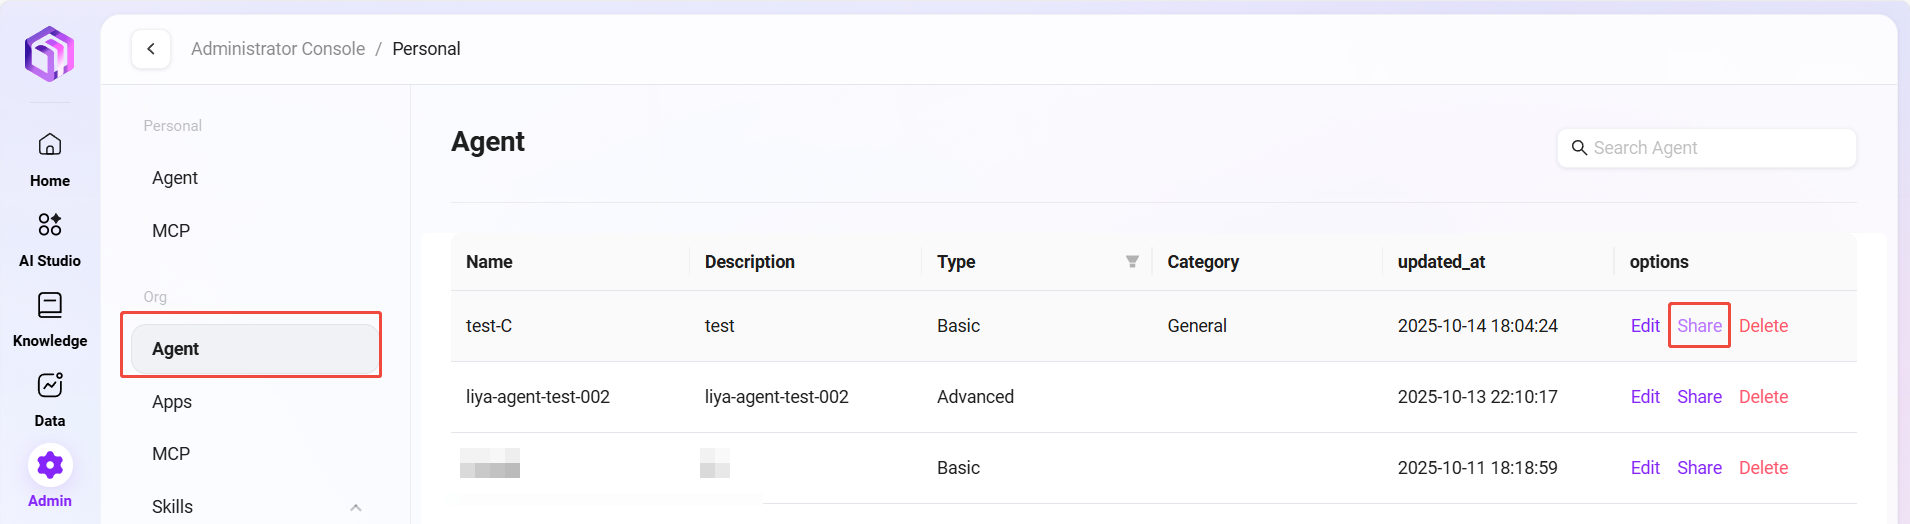
- Go to Management -> Agent Management -> Organization -> Agents, find the assistant you want to share;
- Click the "Share" button on the right side of the assistant;
- The system will generate a dedicated Share Configuration Code;
- Click "Copy Configuration Code" and save the code for later use.
💡 Note: Agents created via the "Basic Creation" method currently do not support the sharing feature. To create shareable Agents, please use the "Workflow Creation" method.
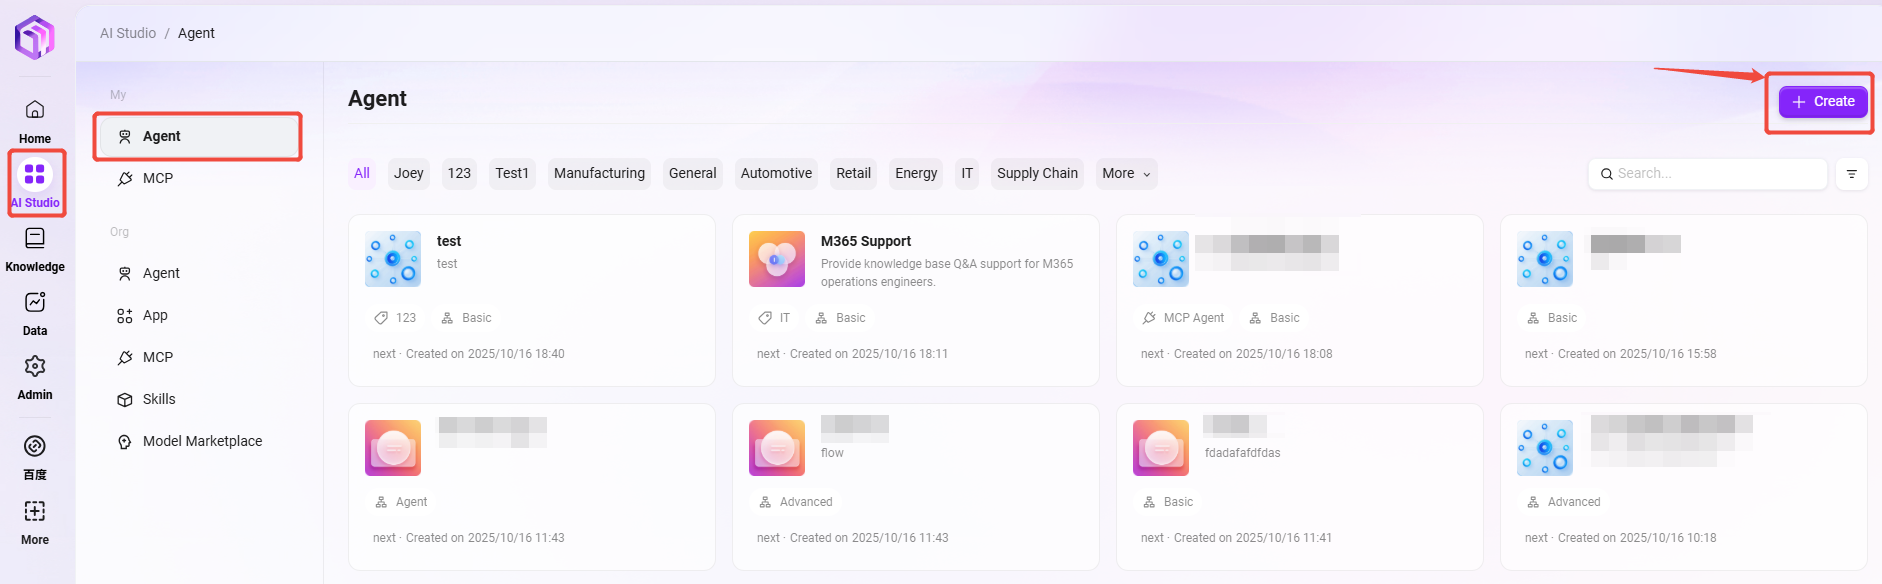
- Create a New Assistant Using the Configuration Code
- Return to the AI Studio page and click the "Create Assistant" button in the upper right corner;
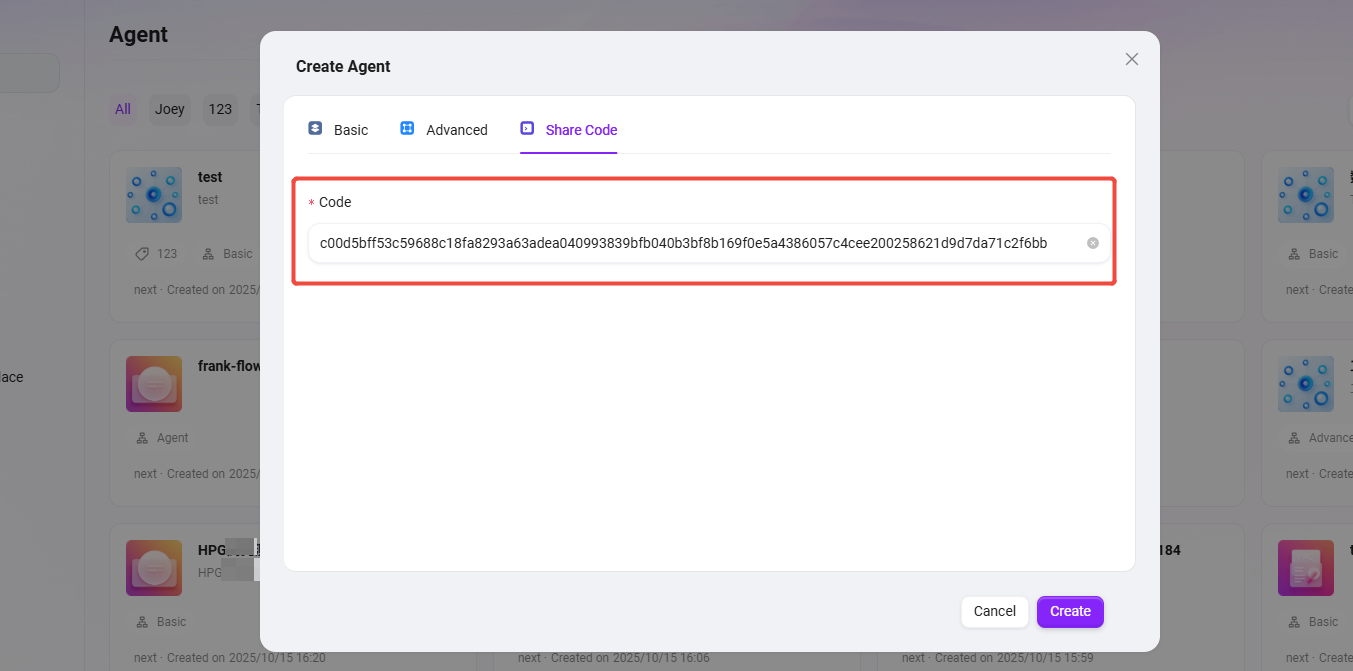
- Select "Create by Share Code" as the creation method;
- Paste the copied configuration code into the input box that appears and click "Create";
- The system will automatically redirect to the corresponding configuration page. Select "Public Agent" to make it an organization-level Agent.
💡 Note: After the system redirects to the configuration page, users can personalize and modify the configuration based on their specific needs using the original configuration provided by the system.
How to Create an Organization APP
Only administrators or users with APP management permissions can create APPs. Follow the steps below to complete the creation:
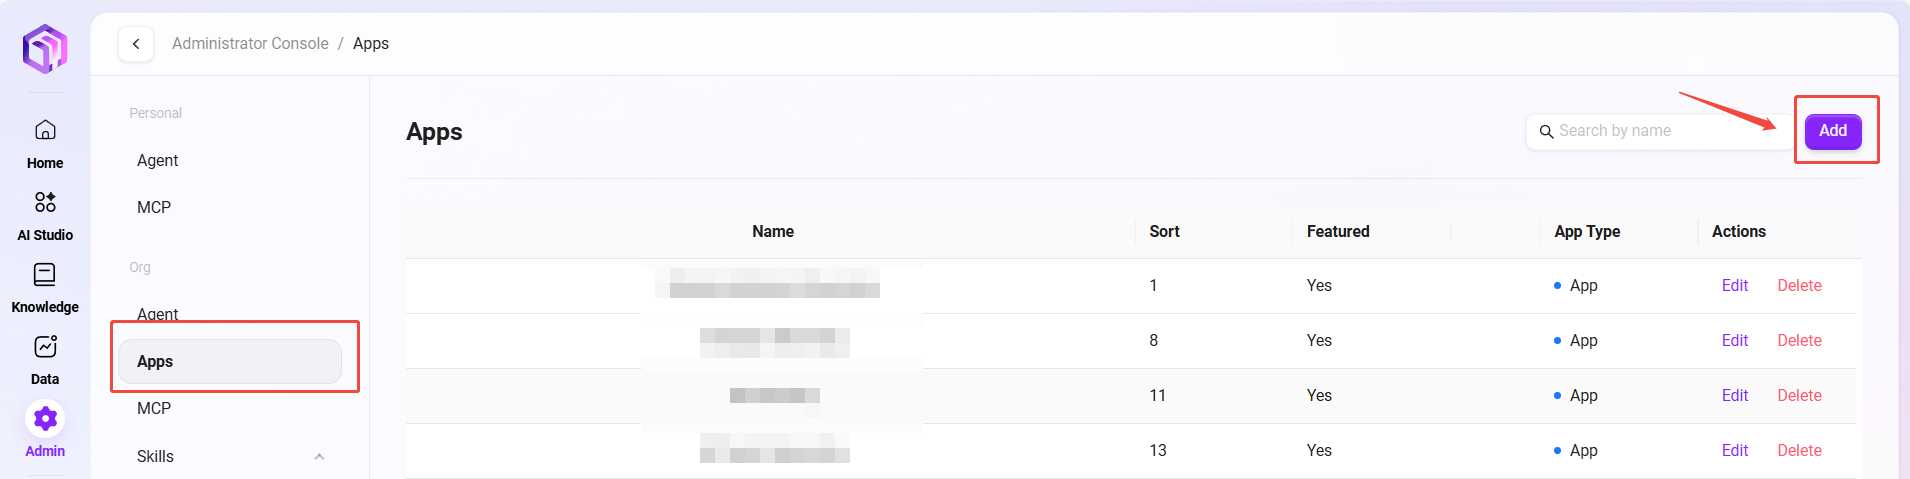
- First, navigate to "Management -> Agent Management -> Organization -> APP",
- Click the Add button in the upper right corner of the page;
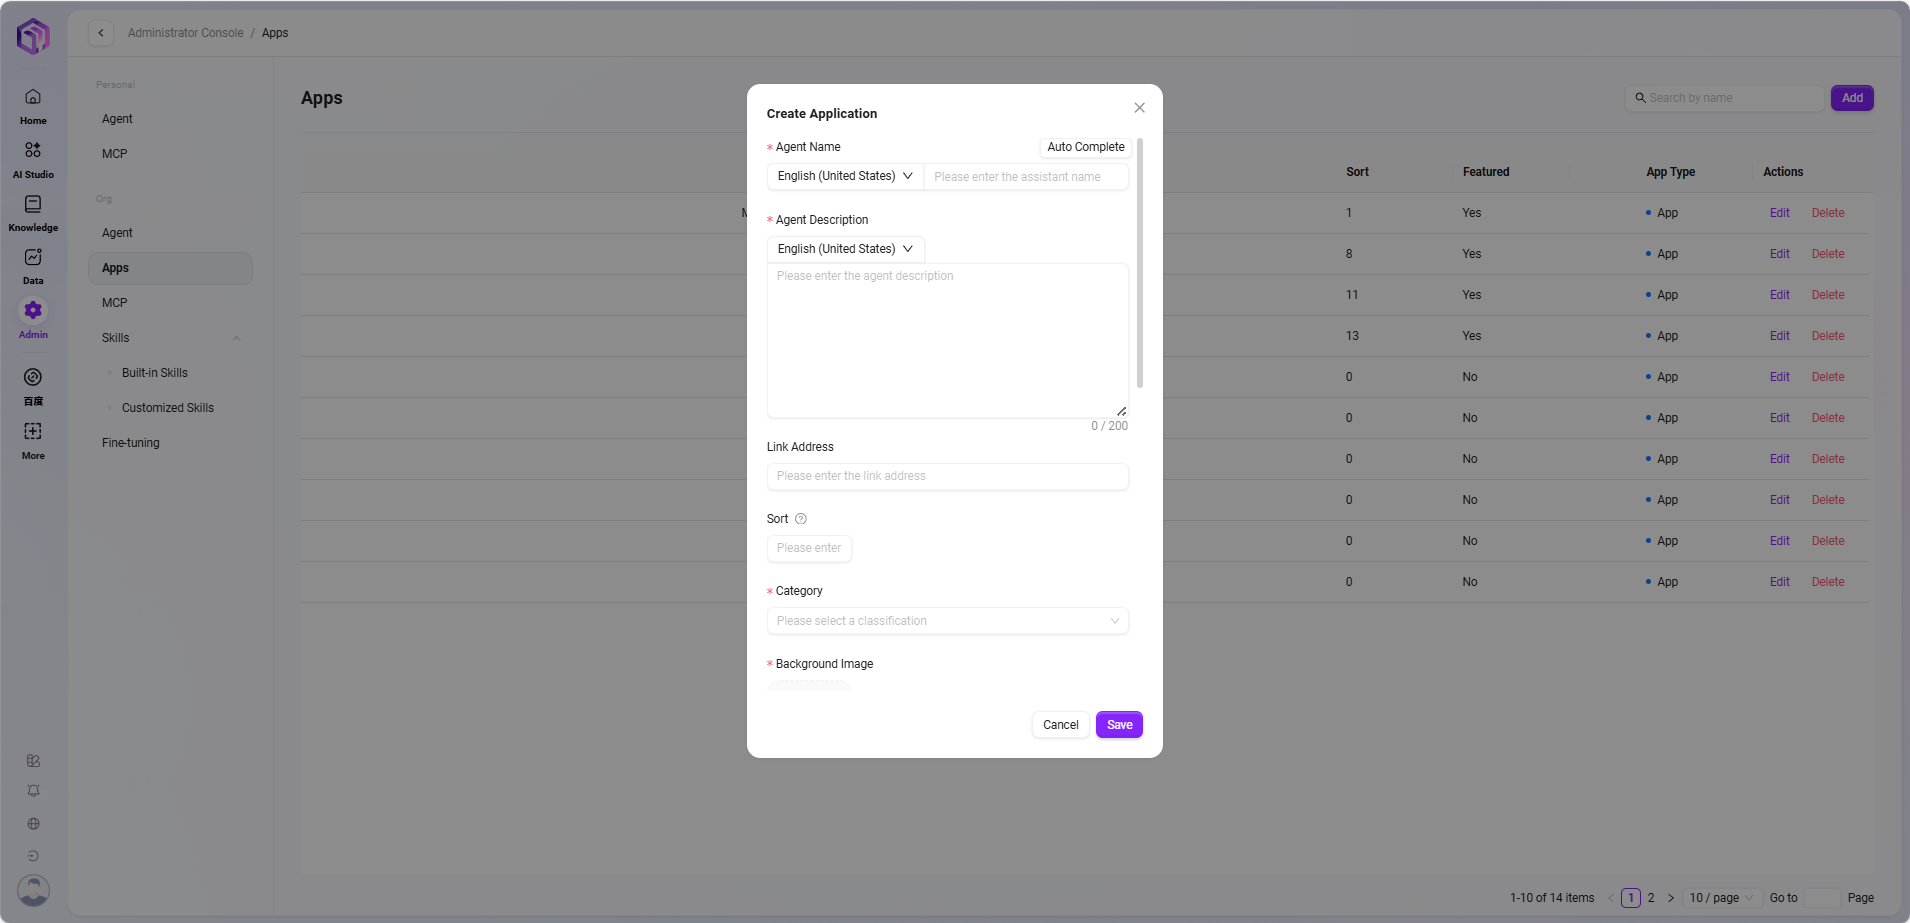
- Enter the Application Name, you can use the "One-click Completion" feature to fill in names in other languages.
- Agent Description: A brief description of the APP’s functionality.
- Sort Order: Set the order of the current application in the AI Workshop.
- Upload the application background image, which can be selected and uploaded from local files.
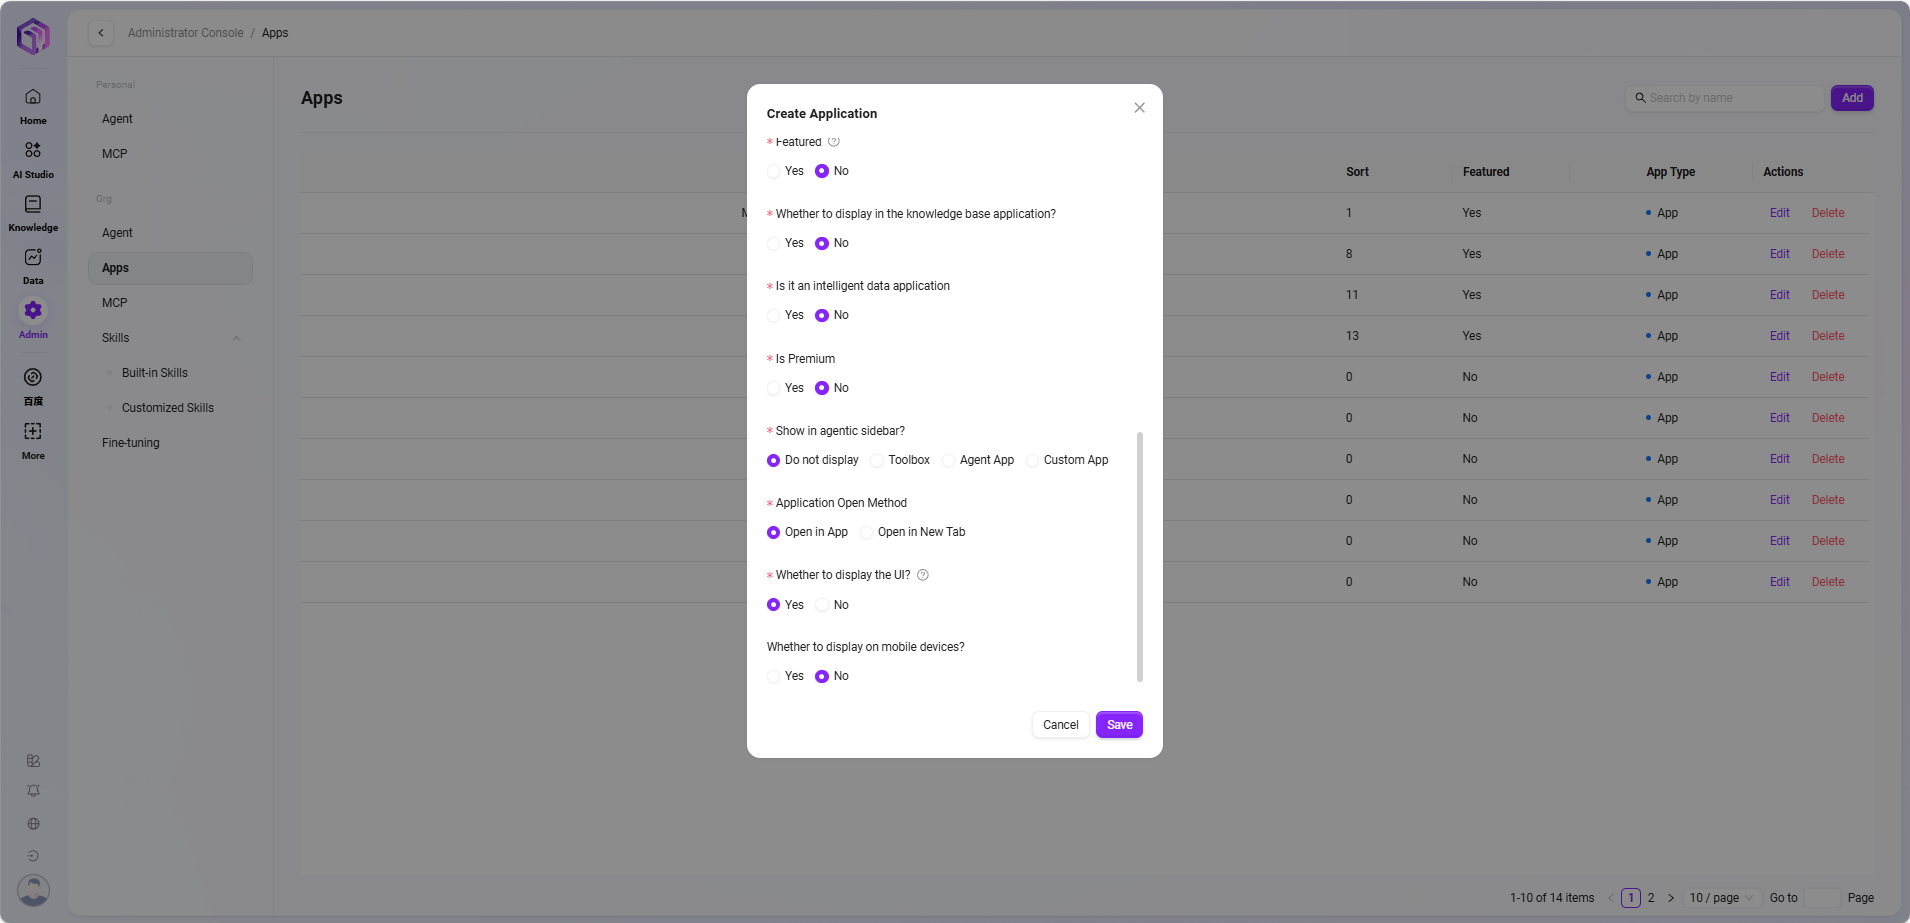
- Recommended or Not: If "Yes" is selected, the application will appear on the recommendation page for easy access; if "No", the application must be found in the corresponding category.
- Whether it is a Knowledge Base Application: Knowledge base applications are built based on knowledge base content.
- Whether to display in the Agentic Sidebar: On the application page, there is a sidebar on the left. You can choose whether to display the newly created application in the sidebar for easier use.
- Application Type:
- Copilot App: Requires entering the Assistant ID during creation, and will automatically redirect to the corresponding configuration page for creation.
- AI App: Requires entering a link address during creation, and will automatically redirect to the link address when used.
- Application Opening Mode: Set whether the application opens within the app or in a new tab.
- Display UI or Not: Enabled by default; if disabled, the application will be displayed in full screen.
- Display on Mobile Devices or Not: Controls whether the APP is displayed on mobile devices.
- After filling in the information, click "Confirm" to successfully create the app.
Built-in Product Applications
The system has pre-installed the following core applications, ready to use out of the box (some examples):
- AI Summary: Automatically extracts the core content of long texts to help you quickly grasp key information.
- AI Translation: Provides accurate and fluent multilingual translation to easily break communication barriers.
- Intelligent Mind Map: Structures complex ideas and generates clear mind maps with one click.
- AI Poster Generation: Quickly generates beautifully designed promotional posters based on user themes and styles.
How to Create an Organization MCP
Organization MCPs are responsible for connecting external tools, data sources, and services, providing powerful capability extensions for AI assistants.
Creation Steps
- Create a Personal Agent: First complete the configuration and creation of a personal Agent.
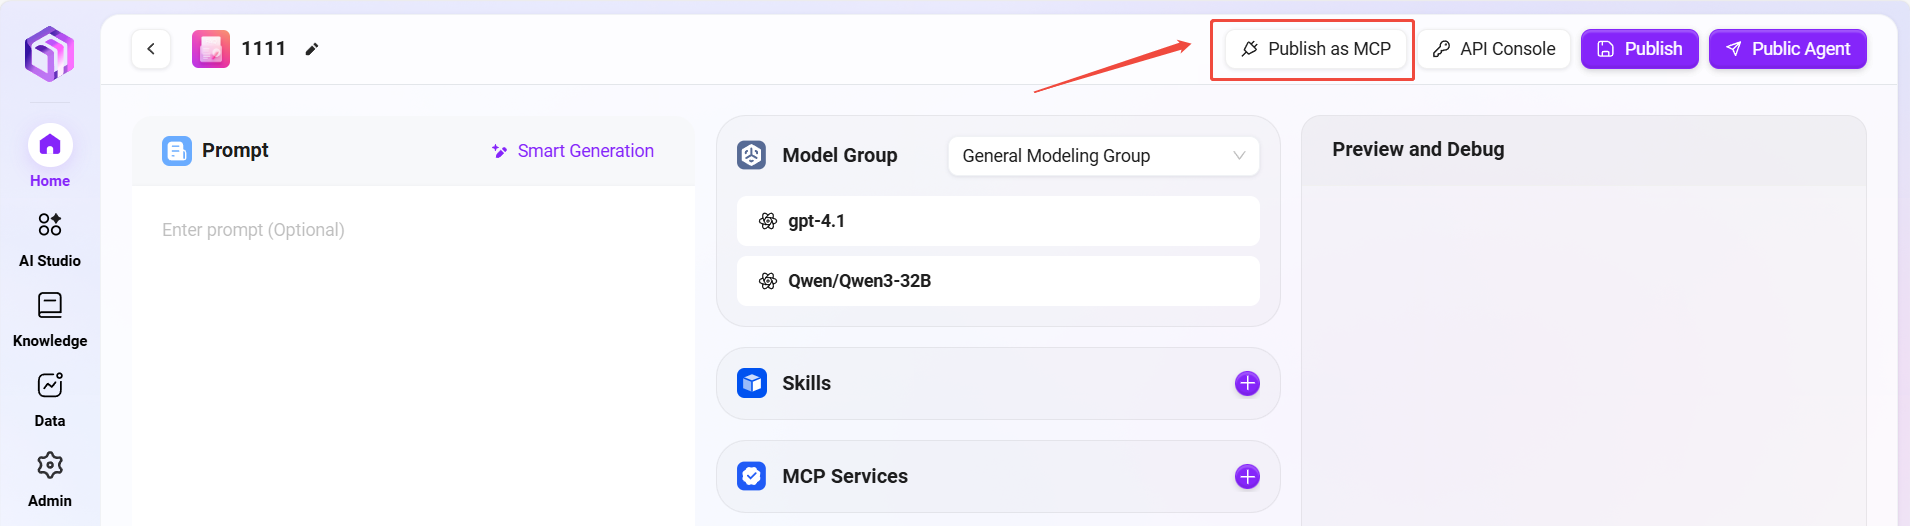
- Enter the Configuration Page: Locate and enter the configuration page of the Agent.
- Select Publish: In the configuration options, select "Publish as MCP".
- Complete Creation: After successful operation, the Agent becomes an organization-level MCP.
- Core Functions
- Extend AI Capabilities: Connect AI models to external tools, data sources, and APIs to overcome inherent functional limitations.
- Unified Service Management: Standardize and reuse common functions across the organization to improve collaboration efficiency and security.
- Standardized Integration: Simplify the integration process of various services with AI systems through unified protocol specifications.
- Permissions and Classification: Support service classification by industry (e.g., manufacturing, retail, energy) and control access permissions.
How to Create Organization Skills
To meet diverse needs and achieve flexible functional extensions, the skill system is mainly divided into two categories: Built-in Skills and Custom Skills.
- Built-in Skills: Advantages include stability and convenience, suitable for general scenarios.
- Custom Skills: Advantages include flexibility and exclusivity, capable of solving specific problems.
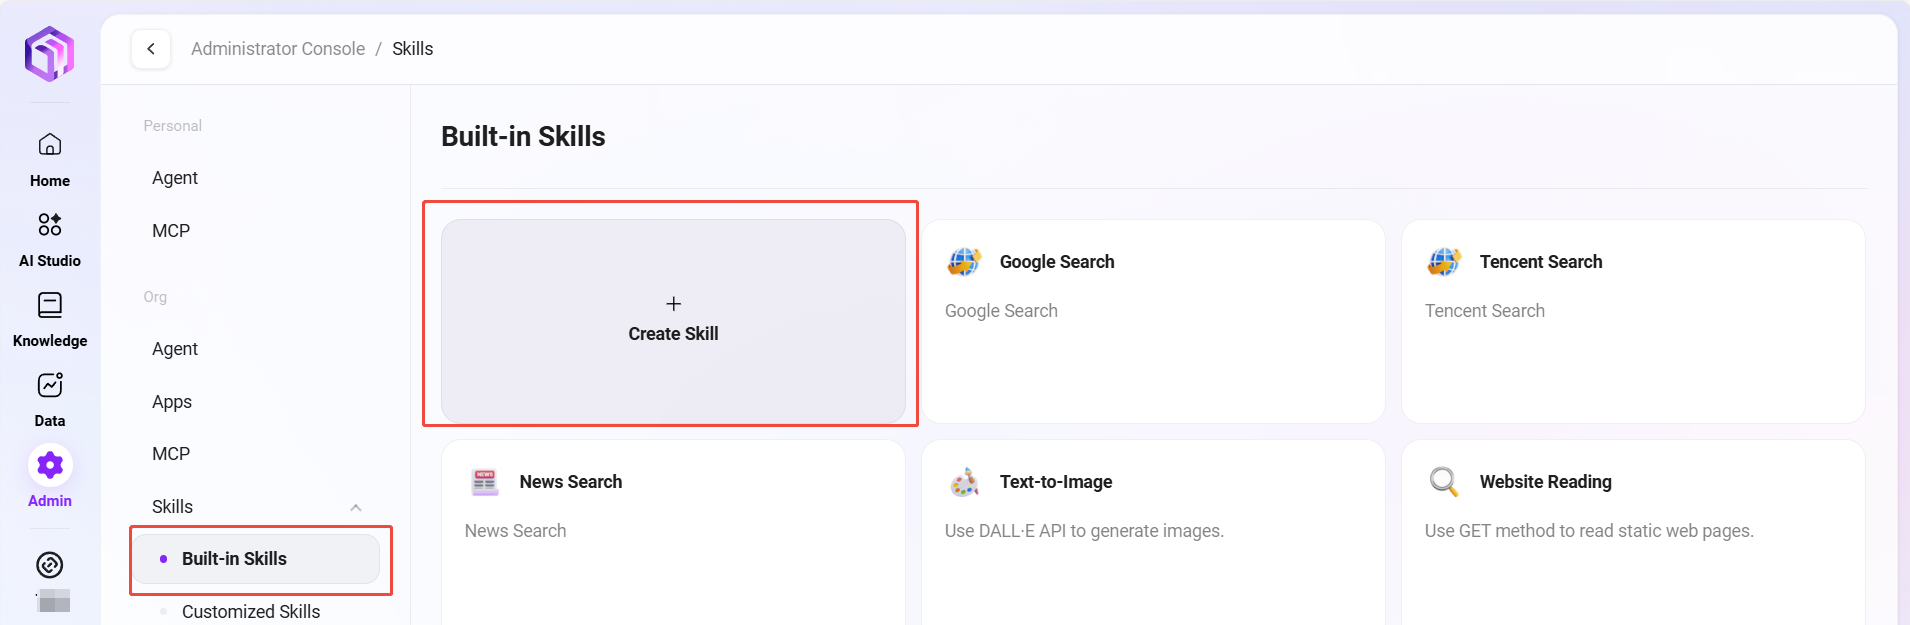
Adding Built-in Skills
- Navigate to "Management -> Agent Management -> Organization -> Skills";
- Select "Built-in Skills";
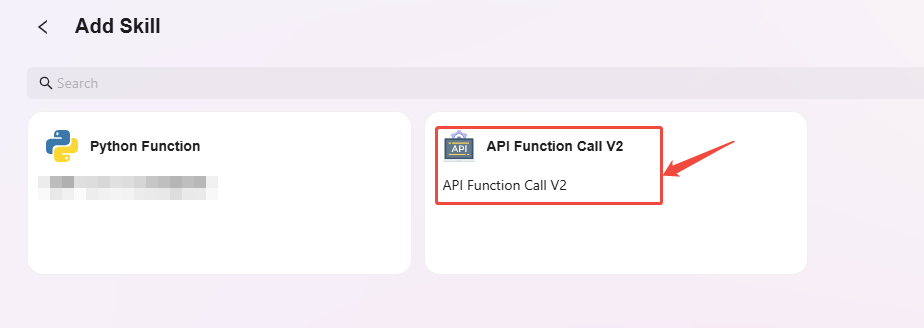
- Click Add Skill and choose the skill you want to add.
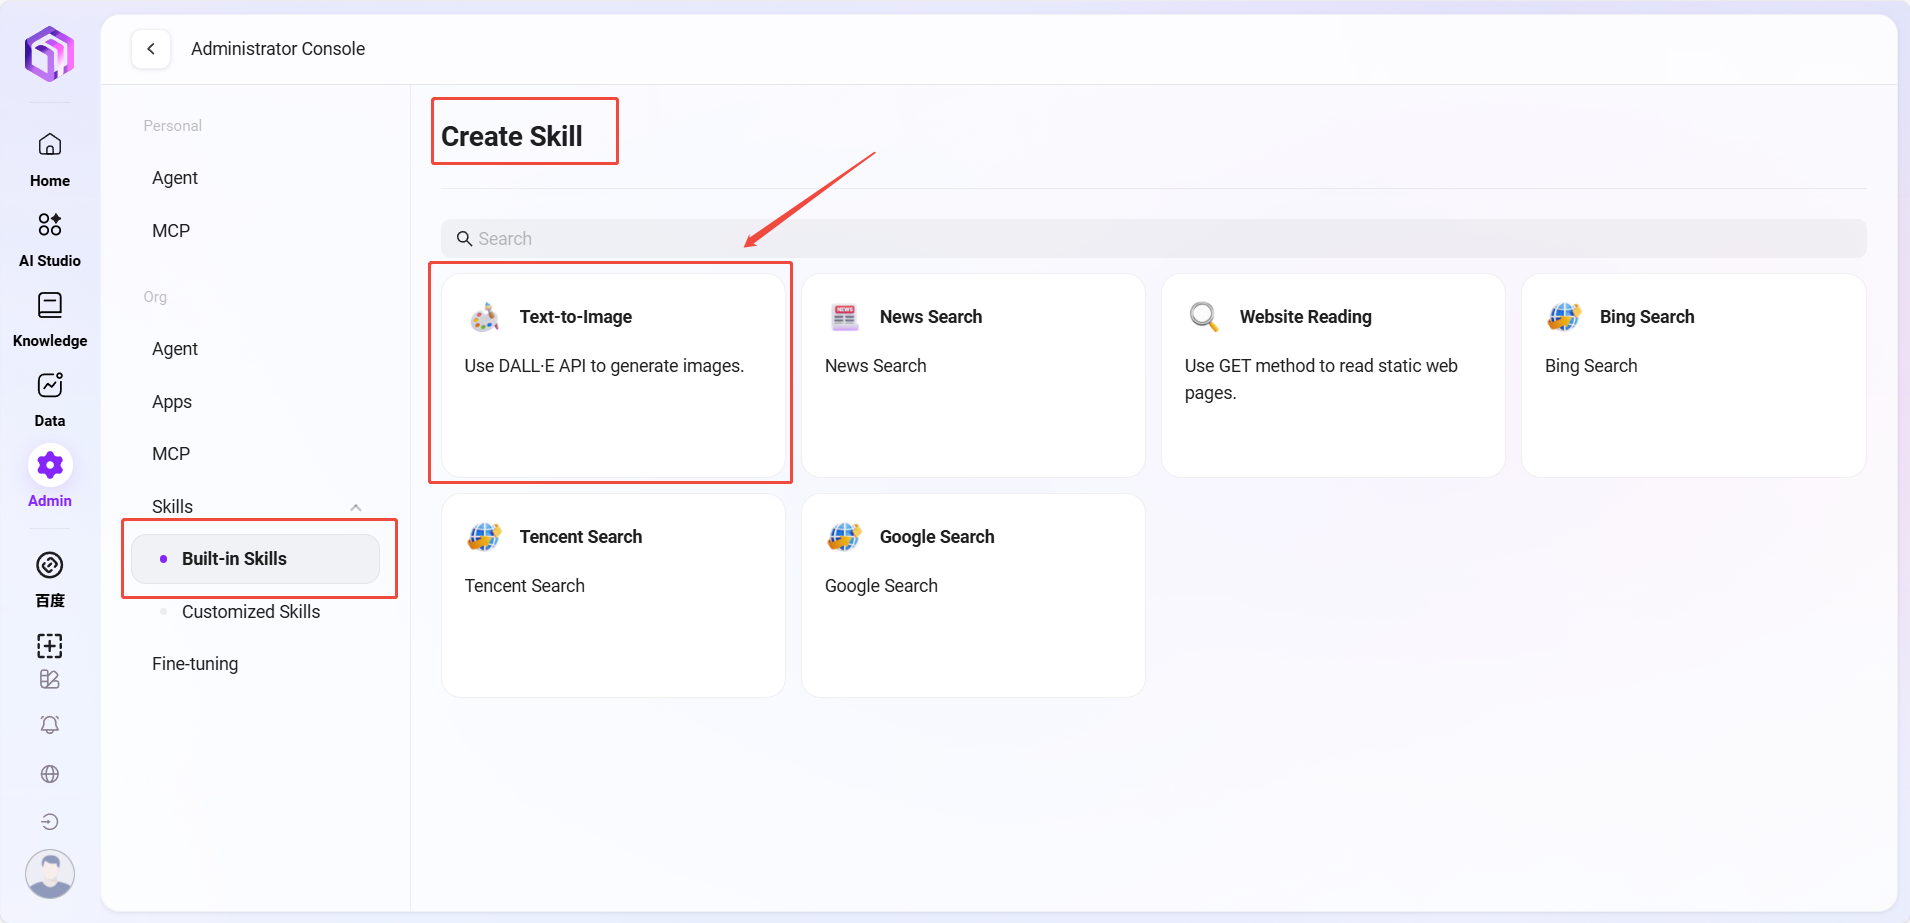
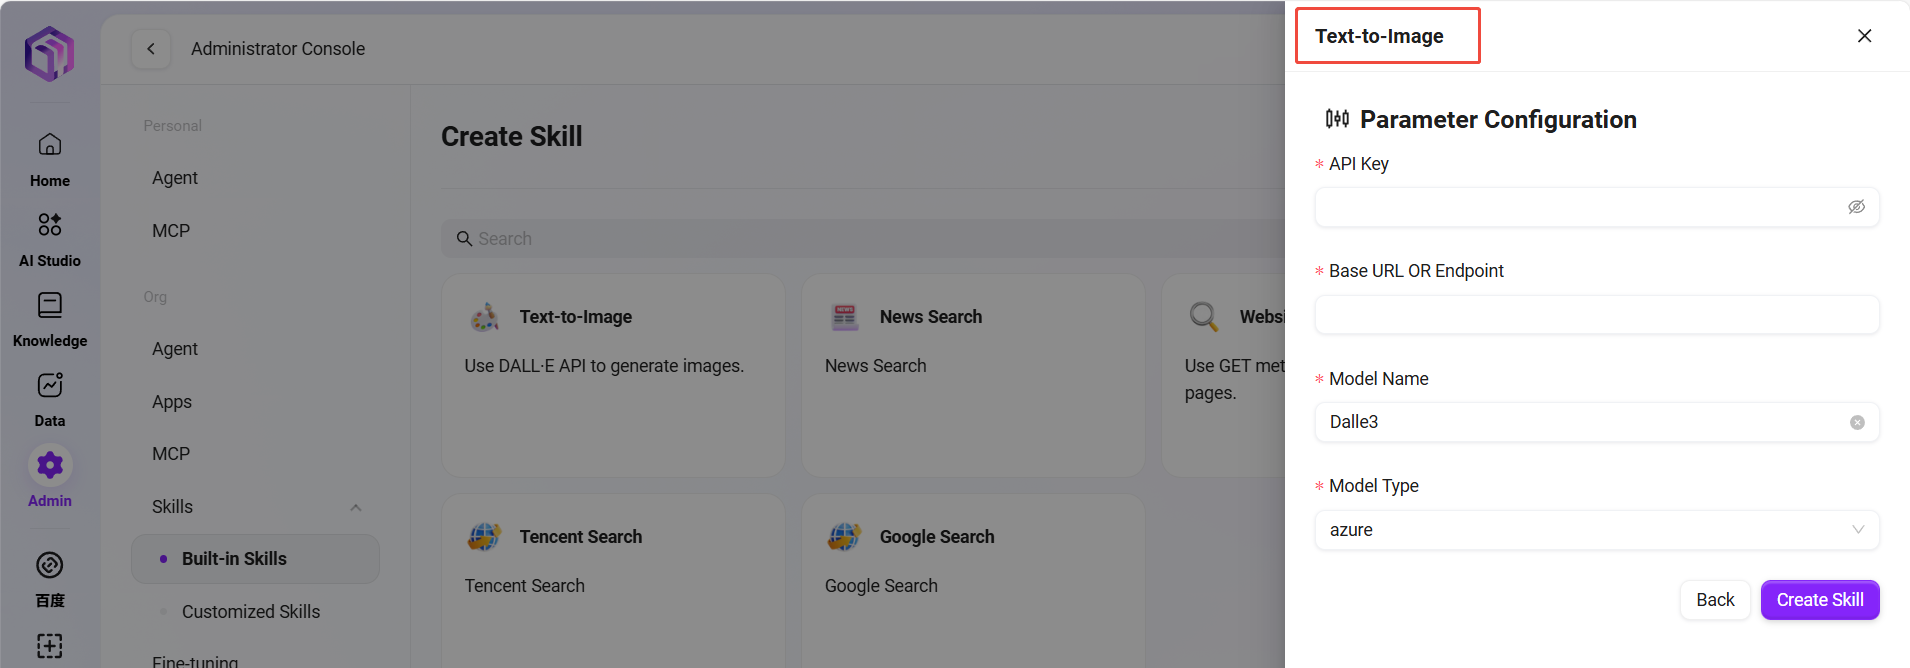
- Built-in Skills: Use system-preinstalled, ready-to-use standardized skills.
- Custom Skills: Create and configure personalized skills that fit your unique business processes.
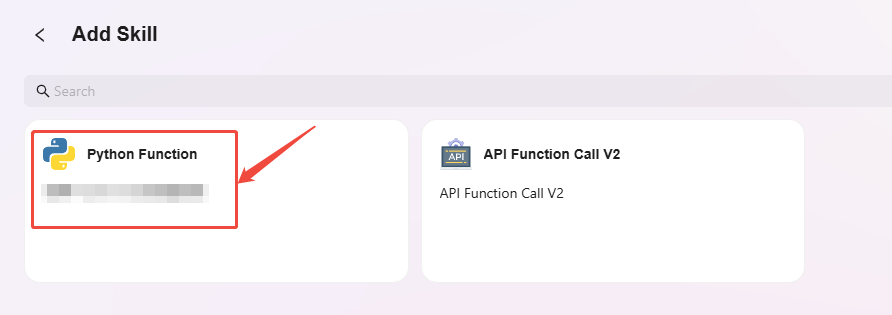
Creating Custom Skills
There are multiple ways to create custom skills, among which Python and API are two common methods. SERVICEME supports both:
-
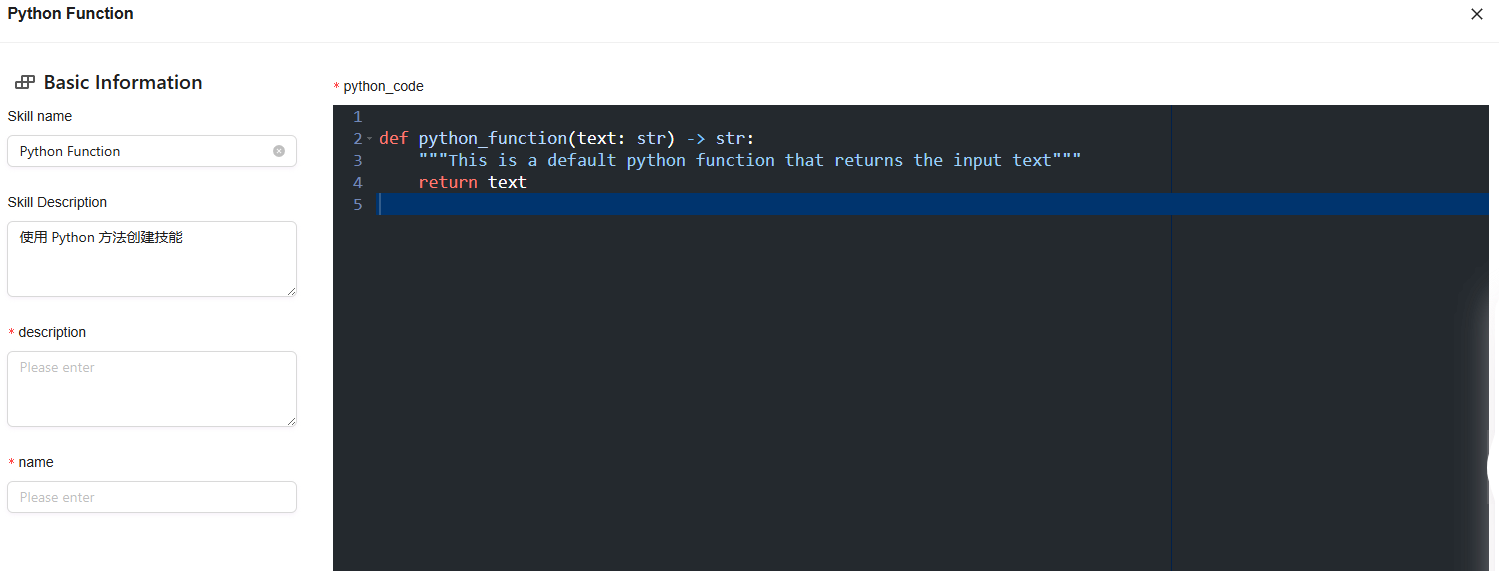
Creating Custom Skills Using Python
Python is a flexible and powerful programming language suitable for scenarios requiring complex logic or data processing. Through Python, users can create powerful custom skills supporting highly customized operations and processing logic.
-
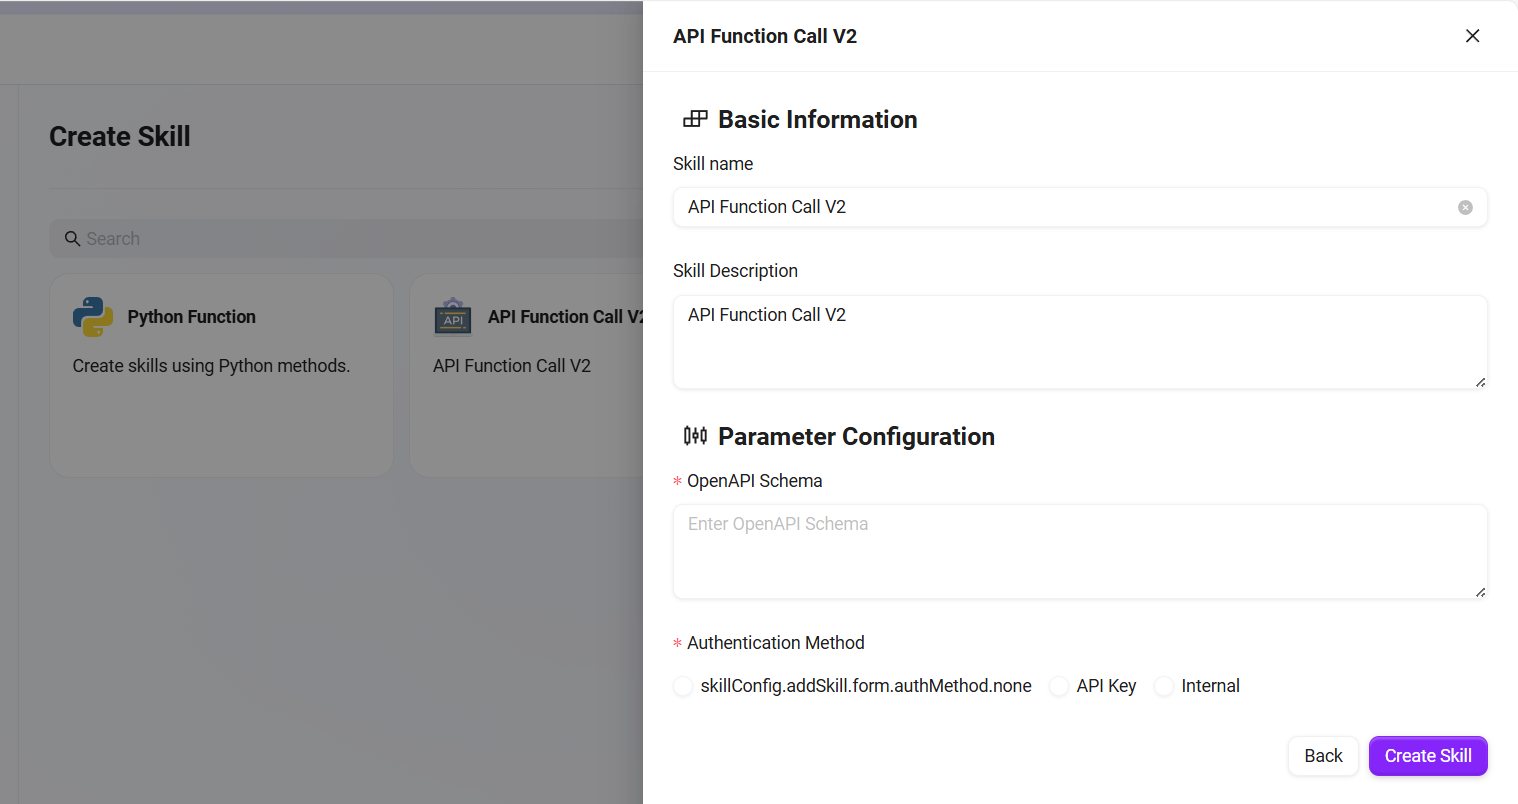
Creating Custom Skills Using API
Creating custom skills via API (Application Programming Interface) is a more direct and simpler method. It is especially suitable for scenarios requiring interaction with other services or systems. By calling existing APIs, users can quickly integrate external services and enhance the assistant’s capabilities.